Auto Trim: Recover A Truck Bench Seat.
Learn To Sew Channels And Work With Vinyl.
Or Learn Automobile Reupholstery On Full Screen DVD Video (it's easier and faster!)Please read safety information before starting any project in our series.
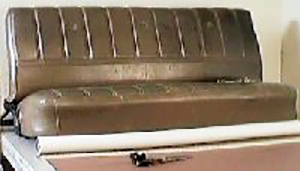
This bench seat is out of a full size American pickup truck. The back folds forward so we are able to remove it. Many car bench seats, especially out of four door cars, have rigid backs and you have to cut and/or sew around the frame just like a piece of furniture. About the only difference between a truck seat and car bench seat is that the fabric only covers a portion of the outside back on many trucks (see side view below) and all of it on a two door car. The outside back fabric will usually attach under the back of the seat on a four door car.

This is the new reupholstered seat. We've made some modifications. The original back had channels that were pressed into the vinyl at the factory, our's are sewn in . Before starting a job like this, study Basic Cutting and Sewing procedures. You don't need to cut vinyl welt cord material on a bias as with most upholstery fabrics. Most vinyls are 54" wide. This seat is about 58" wide so it was necessary to cut the job up the roll. Try tugging on a piece of vinyl you'll notice it stretches a little across the roll and a lot up the roll. Here's an important thing to remember: if you make a car seat cover and it goes on easy it's probably going to wrinkle the first time someone sits on it. We cut it tight and pull it taunt. We will, of course, initially block the seat out larger than necessary in order to compensate for the fabric being drawn in during the quilting process (tuck and roll). Your seat may be a combination of vinyl and fabric (inserts). Sew those pieces together before you do any shaping.
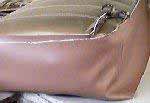
This seat is in 4 pieces: the top plate, front boxing, and 2 side boxing pieces. It has a single welt cord between the plate and boxing. Block out the entire job to get the best cuts. Measure carefully, the top of the center boxing on this seat is about about 1 1/2 inches wider than the bottom. This will take up the slack. There is little room to hide extra fabric here. Sew the 3 boxing pieces together.

Top stitch the seams down like this example. We use a fairly long stitch on heavy materials. Next, pin the boxing around the seat, feel for the old welt cord or the edge wire of the seat itself, and chalk it off. You can take apart the old cover for a pattern if it makes you feel better, just make sure the last guy that did the job did it right. (The channels on the seat and back didn't line up on the old piece). Notch the centers of the plate and boxing. Fold the boxing in half and make sure both the right and left sides are the same before cutting. We didn't make a seam allowance like we tell you to do in almost every other segment of our series, we stretch it to fit. We also do this for restaurant booths. Remember you should have to fight the cover on, at least a little bit.
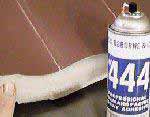
Mark out the channels with a piece of chalk. These are about 6" apart. Cut out a piece of scrap fabric and also apiece of bonded polyester cushion wrap the same size as the seat plate. Spray glue the three pieces together with the Dacron wrap in between. Spray the glue on the wrap and let it dry a minute so you can't feel it through the vinyl fabric, this is only to hold everything straight until it can be sewn.
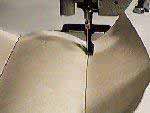
Sew through all 3 pieces using a long stitch. Too tight a stitch can "saw" into the vinyl cutting it. Make sure you have enough bobbin thread to get through the whole job. Our upholstery thread. is equivalent to tex 70 nylon or 69 nylon thread and d92 polyester thread. You can use a home machine for fabric but many cannot handle vinyl - see the machine's instruction manual.

Next center and shape the quilted plate to the old cover or edge wire that goes around the springs.
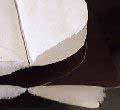
Fold the cover in half to make sure both right and left sides are the same.
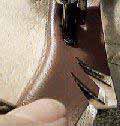
Sew the welt cord to the seat plate making cuts to release the welt material when going around corners. Beginning at the center of the plate, sew down the boxing, then flip it over and sew the plate side to the boxing to finish off the other side. Get as close as possible to the welt so that no threads show.
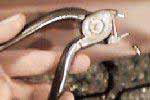
Remove the old seat cover and pad the seat foam with a layer of cotton or bonded polyester. Put some extra padding where the foam is really worn down, usually on the driver's side. Make sure the seams are all pointing down and not twisted. This seat was attached using hog rings with a hog ring plier. Some seats have a strip of plastic which must be sewn to the the cover's boxing, it then slides into a groove on the metal frame.
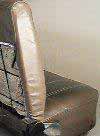
The inside back was cut and sewn in a similar manor as the seat except that it was necessary to sew rod pockets to the plate and boxing to hold a wire which is then hog ringed to the frame.
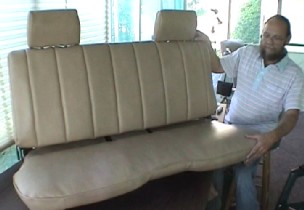
The finished seat.
We hope this info has helped you, but hey, it's easier to learn from our videos!
