From Custom Auto Interiors, Don Taylor and Ron "The Stitcher" Mangus.
(1998 Fisher Books). Used by permission. New version has color photos.(Note: This is an edited text version of Don and Ron's detailed book. Also, due to the low resolution of computer monitors the photos are much clearer in the book. Keep in mind this is an advanced book. Purchase book below)
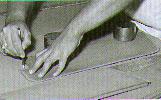
The process begins by removing what's left of the old cover and tracing its outline on a piece of chipboard. George carefully removed the binding so the selvage edge could be included in the outline. Unseen in this photo are the two witness marks George made to indicate the location of the fold lines.
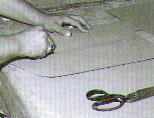
Using the witness marks he made above, George draws a line representing the two edges where the original covers folded. With a razor blade (or any sharp object) he scores the top layer of the chipboard along this line. This allows him to fold along these two lines, leaving a crisp, well-defined edge.
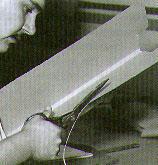
You can see how well the chipboard folded along the scored lines. Now George carefully trims the edges straight and square.
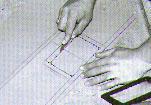
From the local auto parts store, Ron bought a small mirror, designed to be double-taped to a sunvisor or other surface. You see this in the lower right-hand corner of the photo. This mirror will be installed into the sunvisor. George outlines it on the chipboard, then cuts away the part that would cover the glass. The plastic edges will remain covered.
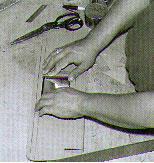
He tests for fit and finds his cutout is just right. Notice that it's about 1/8 inch wider than the glass. When the fabric is applied, the wrapping around the edges will add just enough thickness to bring it even with the glass.
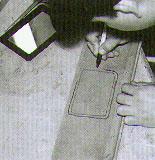
Using the chipboard as a pattern, George outlines the area of the mirror location within the original sunvisor base. He makes another outline, a cutting line, a little larger than necessary. This gives him a bit of room to adjust the mirror for a perfect alignment with the cutout in the chipboard.
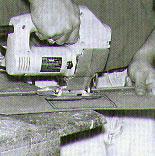
Although the saber saw is almost bigger than the sunvisor, George skillfully removes the area in which the mirror will sit.
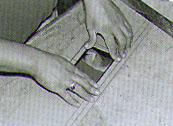
As usual, everything is test-fit before committing it to the finishing touches. Here, George has the mirror sitting in the sunvisor with the chipboard wrapped around it. So far, it looks good.
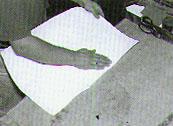
The next step is to cover the chipboard with 1/4 inch closed-cell foam. To make allowance for the extra radius of the polyfoam around the double-folded center, George lays the chipboard cover over the edge of his bench- one side of the "wing" on the bench, the other at a 90-degree angle to it. He then wraps the cemented foam around the radius.

He reverses the chipboard and wraps the other side.

Finished, the polyfoam covering looks like this. Now, when it's wrapped over on itself, there won't be any excessive stretching at the fold.

Trimmed and ready to be covered.To cover the chipboard, George works as you've seen him before. He sands the polyfoam, and in this case bevels the outside edges. This removes bulk at this location. Cement is sprayed to both the material and polyfoam, the cement is allowed to dry, and the material applied. Finally, he wraps the material around the edges and cements it in place.
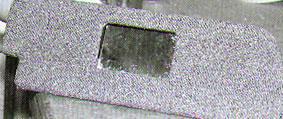
Here's the finished sunvisor seen from the mirror side. George will wash the cement over spray from the mirror glass before he installs it in the car.

The view from the backside. A very nicely done sunvisor-and no one had to struggle!

Toledo Industrial Sewing Machines is a Consew dealer. We sell and service new and used industrial brands of walking foot (including portables), zig-zag and straight stitch machines, including: Adler, Chandler, Consew, Cowboy, Juki and Pfaff. Long arm and double needle models in stock.
Call us toll free, at: 866-362-7397
We stock and sell replacement parts, accessories and attachments for all industrial sewing machines, including needles, bobbins, winders, nylon thread, oil, thread lube, belts, motors, speed reducers, edge binders and folders, edge guides, presser feet, thread snips and commercial scissors.
Our website: http://www.tolindsewmach.com/


